
Connor's Journey
Connor's Journey
Patient Journeys
Connor's Journey
Connor's Journey
While there's so much we can tell you about our passion for transforming smiles, without doubt, the best way to convey the power of what we do is with a real-life patient journey.
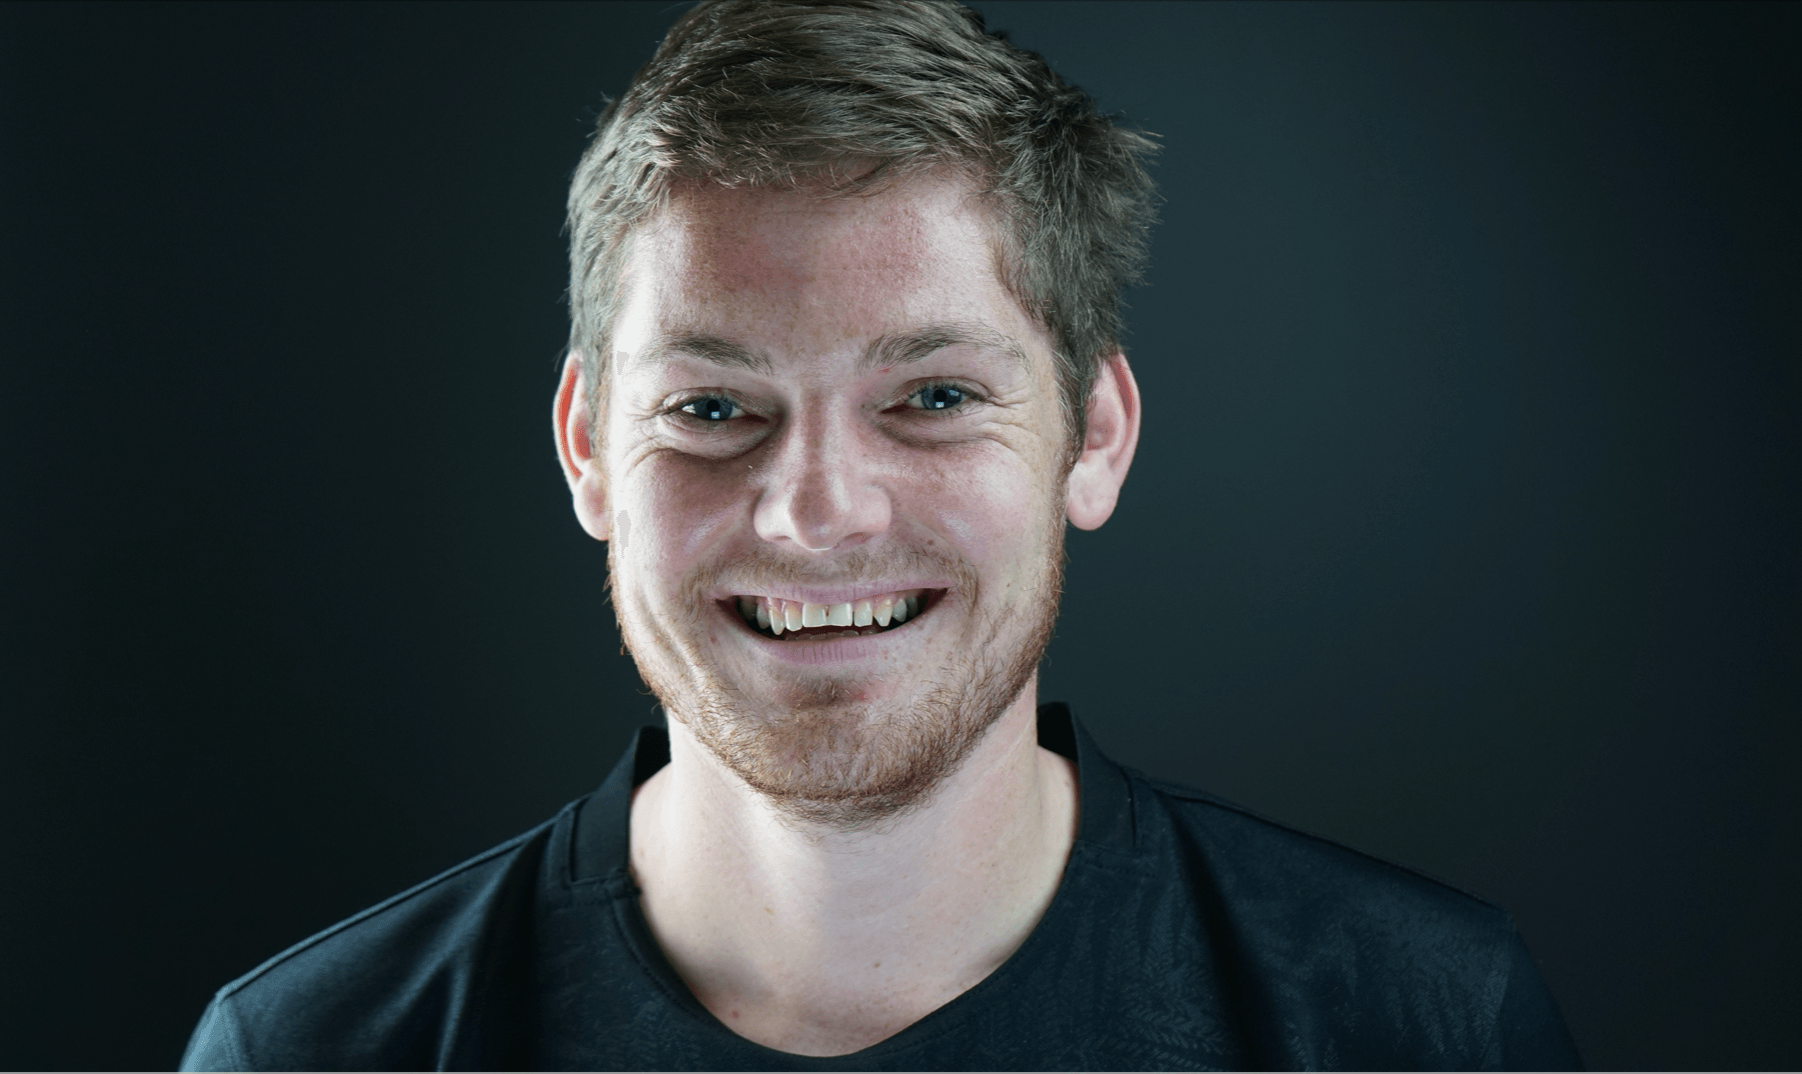
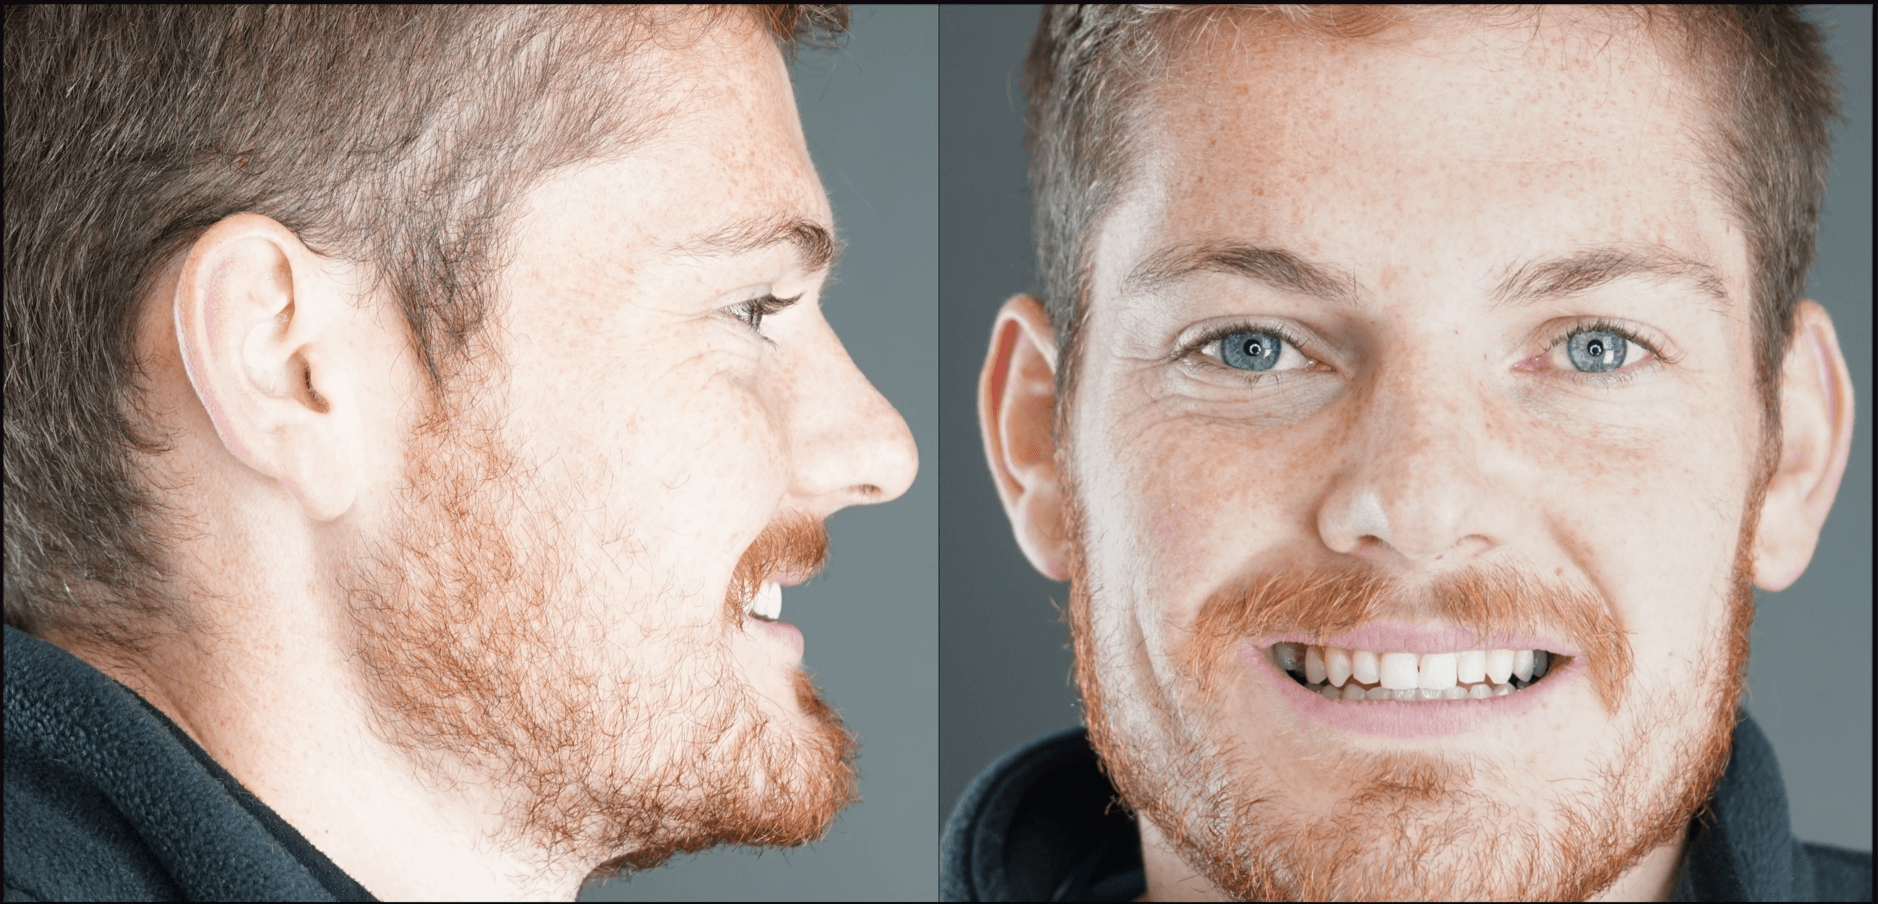
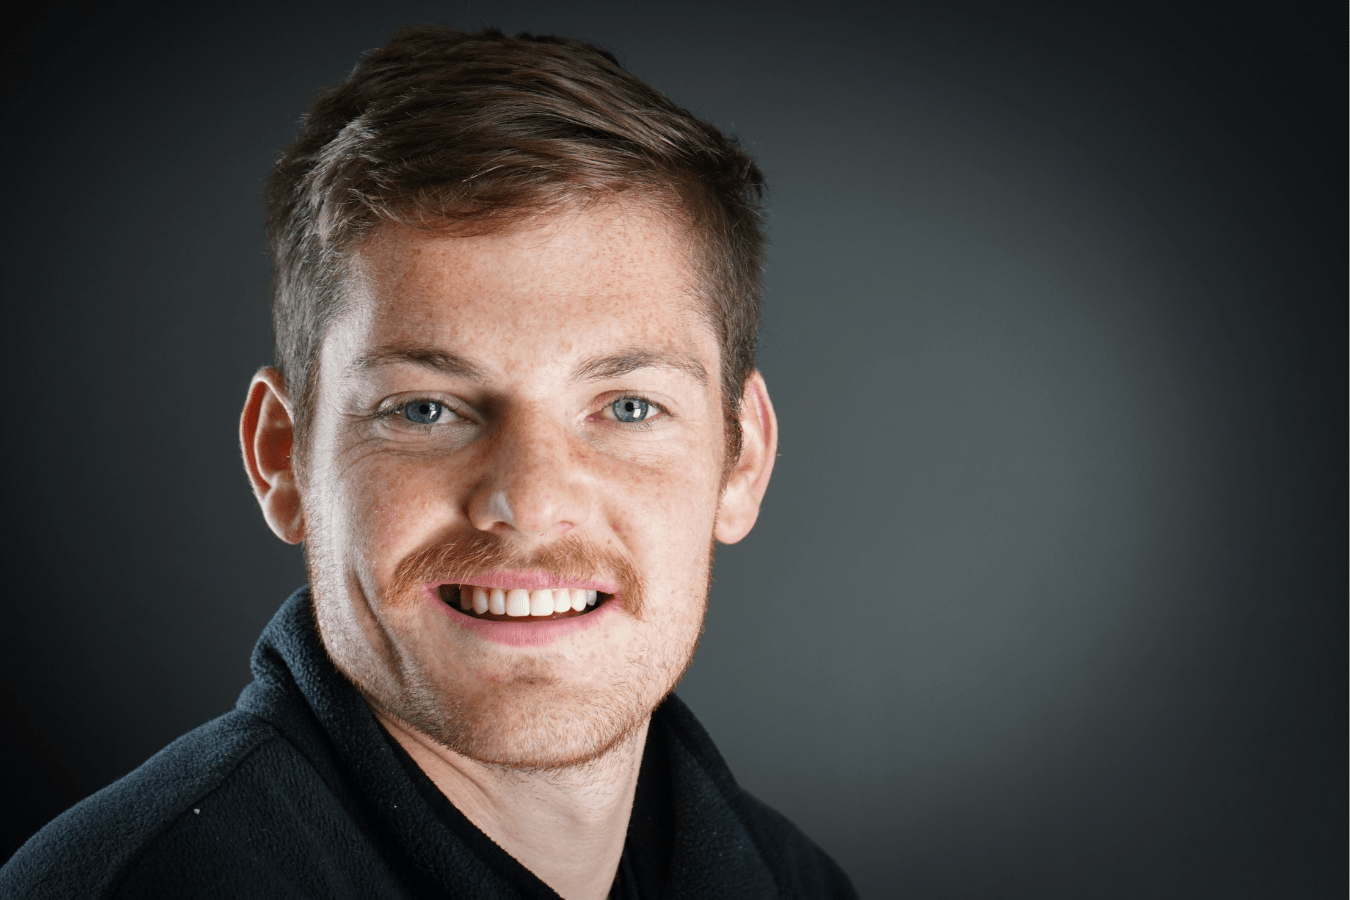
This is Connor.
Despite being a handsome young man, it was clear by the way he restrained his smile that he was extremely self-conscious of his smile.
Connor requests - he wanted a more confident smile.
He came to the right place.
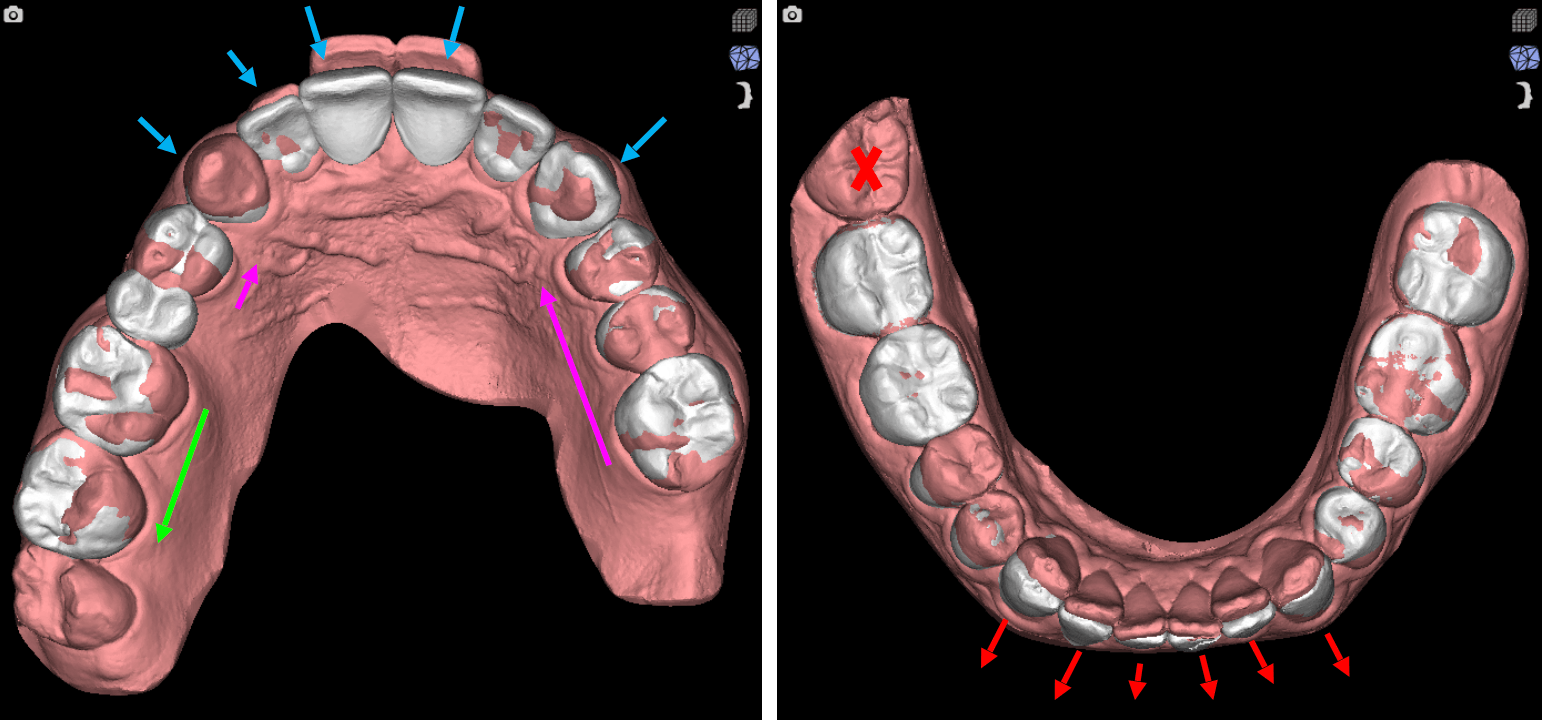
Step 1: Smile Digitisation
In addition to carrying out a thorough dental examination, we captured a series of key photos along with a "smile in motion" video.
We also took a 3D optical scan of his teeth and gums as well as a 3D mini-CAT scan of his jaws.
These are all the records we need to fully digitise your smile.
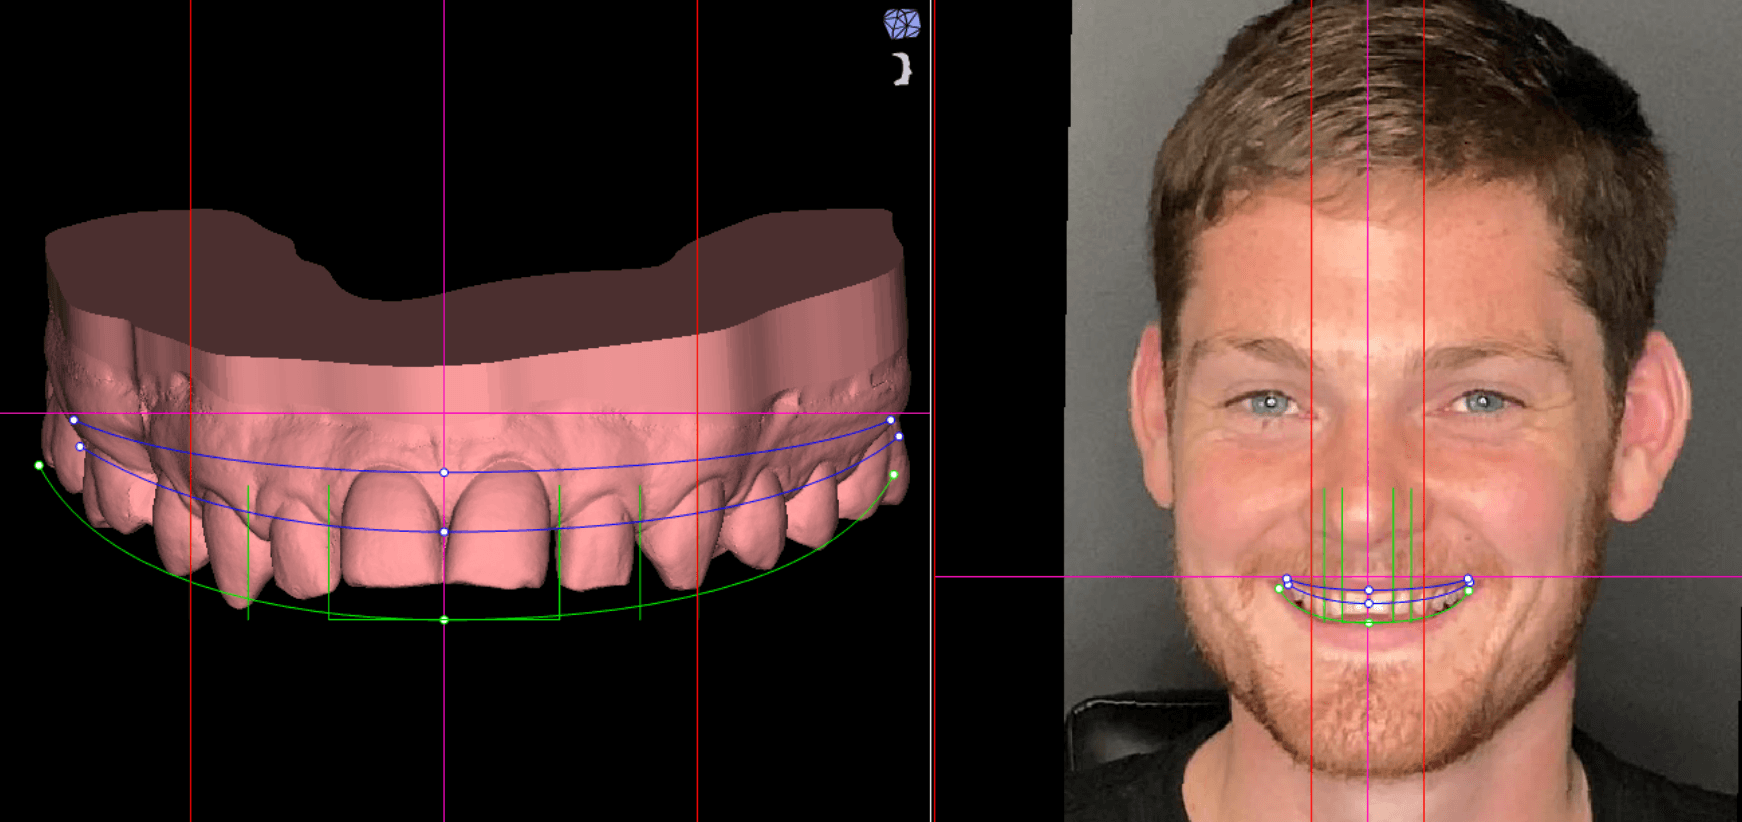
Step 2: Facially Driven Smile Design
Having fully digitised Connor's smile, we sent his records to the DSD Planning Centre in Madrid. Together, we analysed key facial landmarks to design the ideal smile that harmonises with Connor's face.
And this is the ideal smile we designed for Connor.
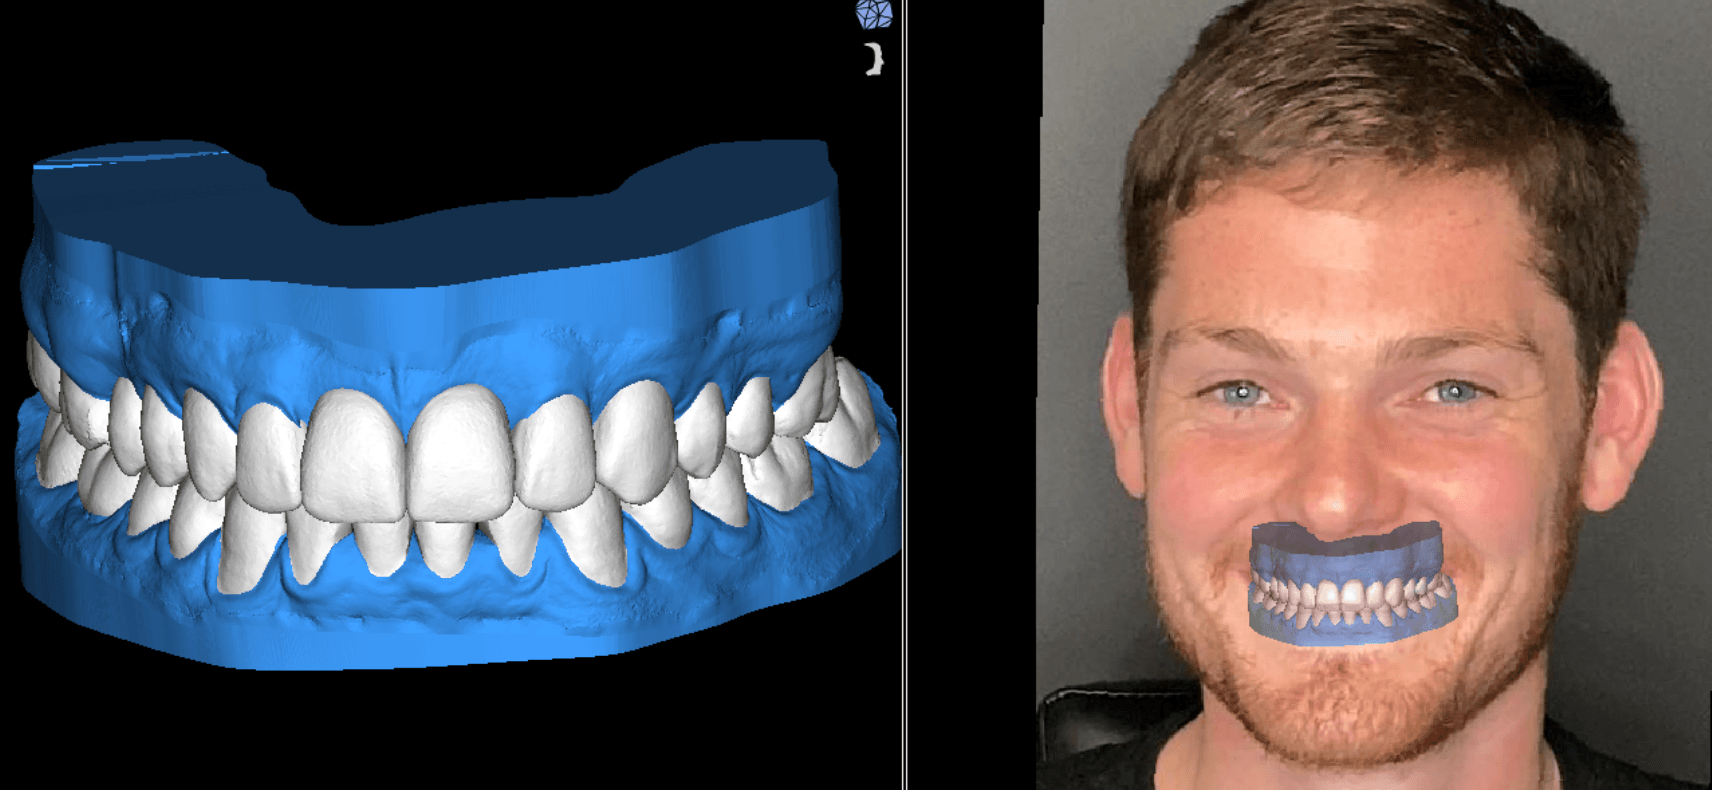
Step 3: Smile Test Drive
Using our in-house 3D printer, we transformed the digital file of Connor's ideal smile into a set of enamel shells that emulate his ideal smile.
We then clipped these 3D printed enamel shells over Connor's teeth before taking him back to our photo studio to take some "before and after" photos and video.
This allowed Connor to experience the look and feel of his ideal smile without committing to any treatment.
What's more, this process empowered Connor to give active, meaningful input into the design of his smile. In this way, our smile test-drive transformed Connor from a passive recipient into an integral co-author of his smile.
Step 4: Comprehensive Treatment Planning
Once Connor was happy with his smile design, in collaboration with the DSD Planning Centre, we crafted a comprehensive treatment plan and presented Connor with a detailed written plan which included details of all treatment goals, fees and timing. This empowered Connor to make a fully informed decision of what it would take to make his ideal smile a reality.
Step 5: Invisalign
In an effort to minimise the amount of invasive dental treatment we'd need to perform for Connor, it was clear that we first needed to move Connor's teeth to the precise position that matched with his ideal smile.
We achieved this using Invisalign.
In essence, Invisalign uses a series of thin clear trays that sequentially move teeth to their ideal positions.
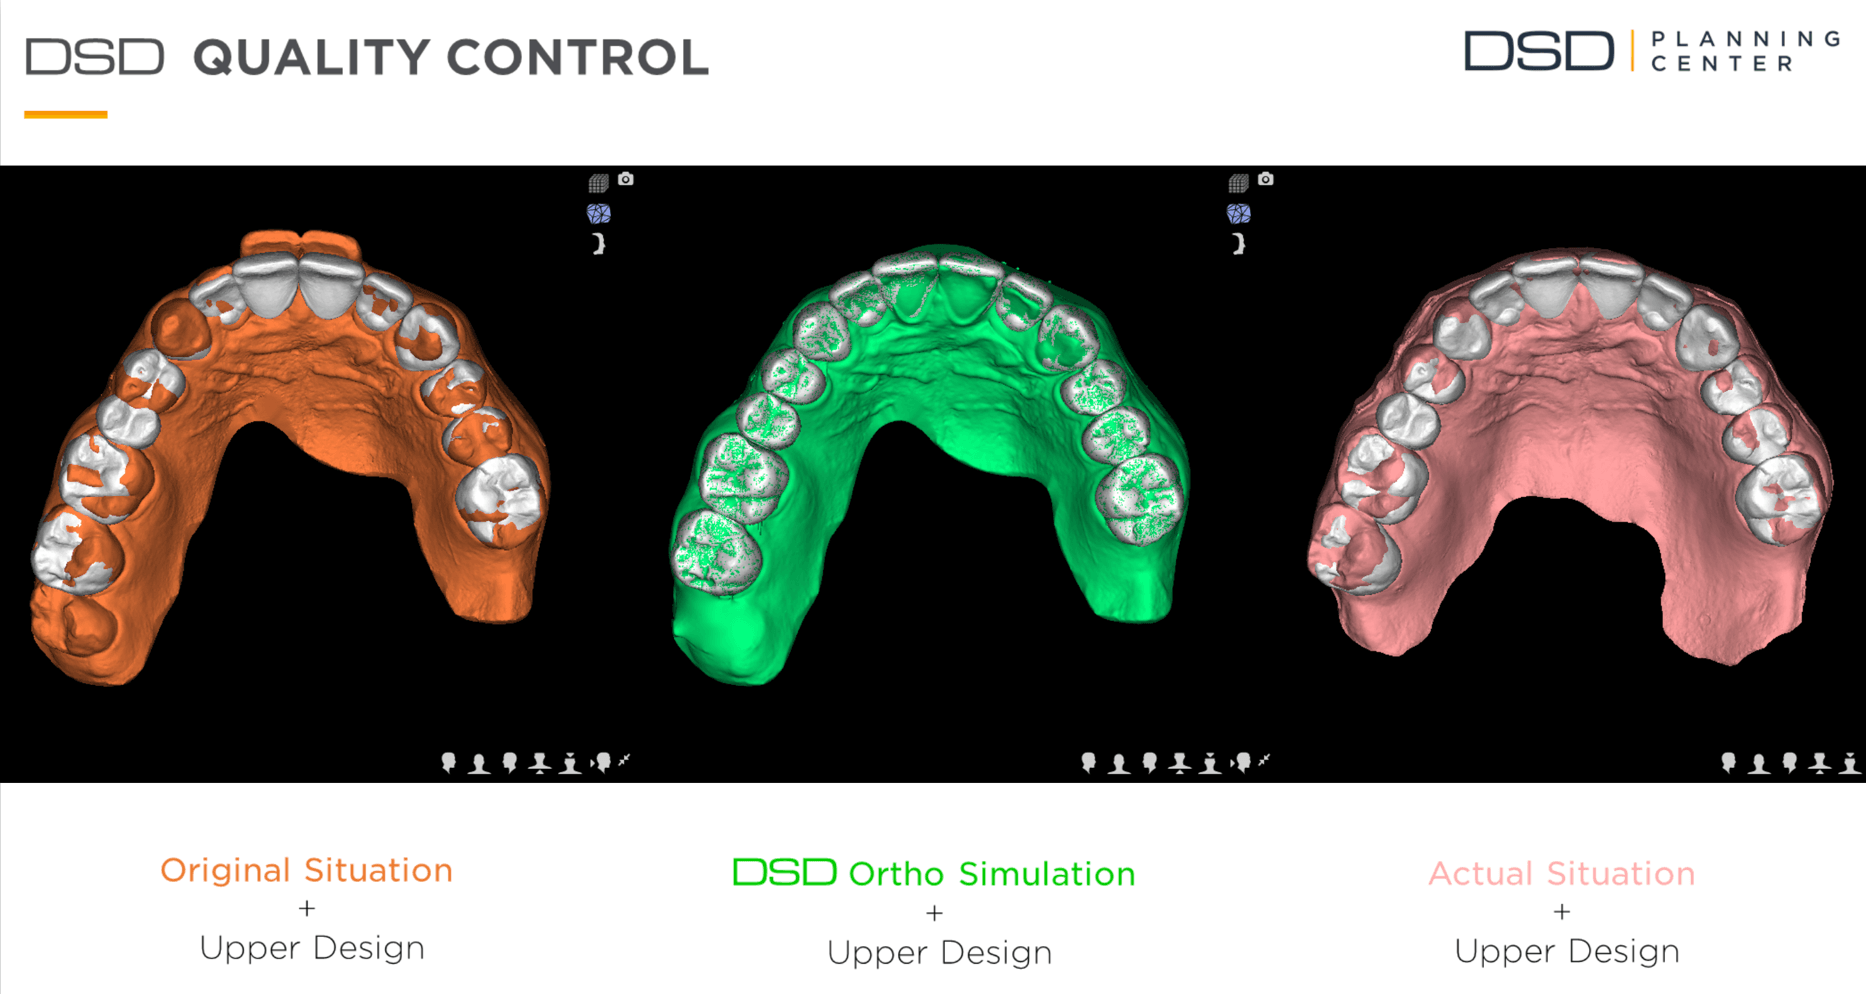
Step 6: Quality Control - Invisalign
When Connor finished his first course of Invisalign, we took a new 3D optical scan of his teeth along with a new set of photos.
On sending these new records to Madrid, the DSD team superimposed Connor's post-Invisalign tooth positions over the planned ideal tooth positions to make sure his teeth were exactly where we needed them to be.
Following this quality-control analysis it was clear that we needed a second short-course of Invisalign to refine the final positions of Connor's teeth.
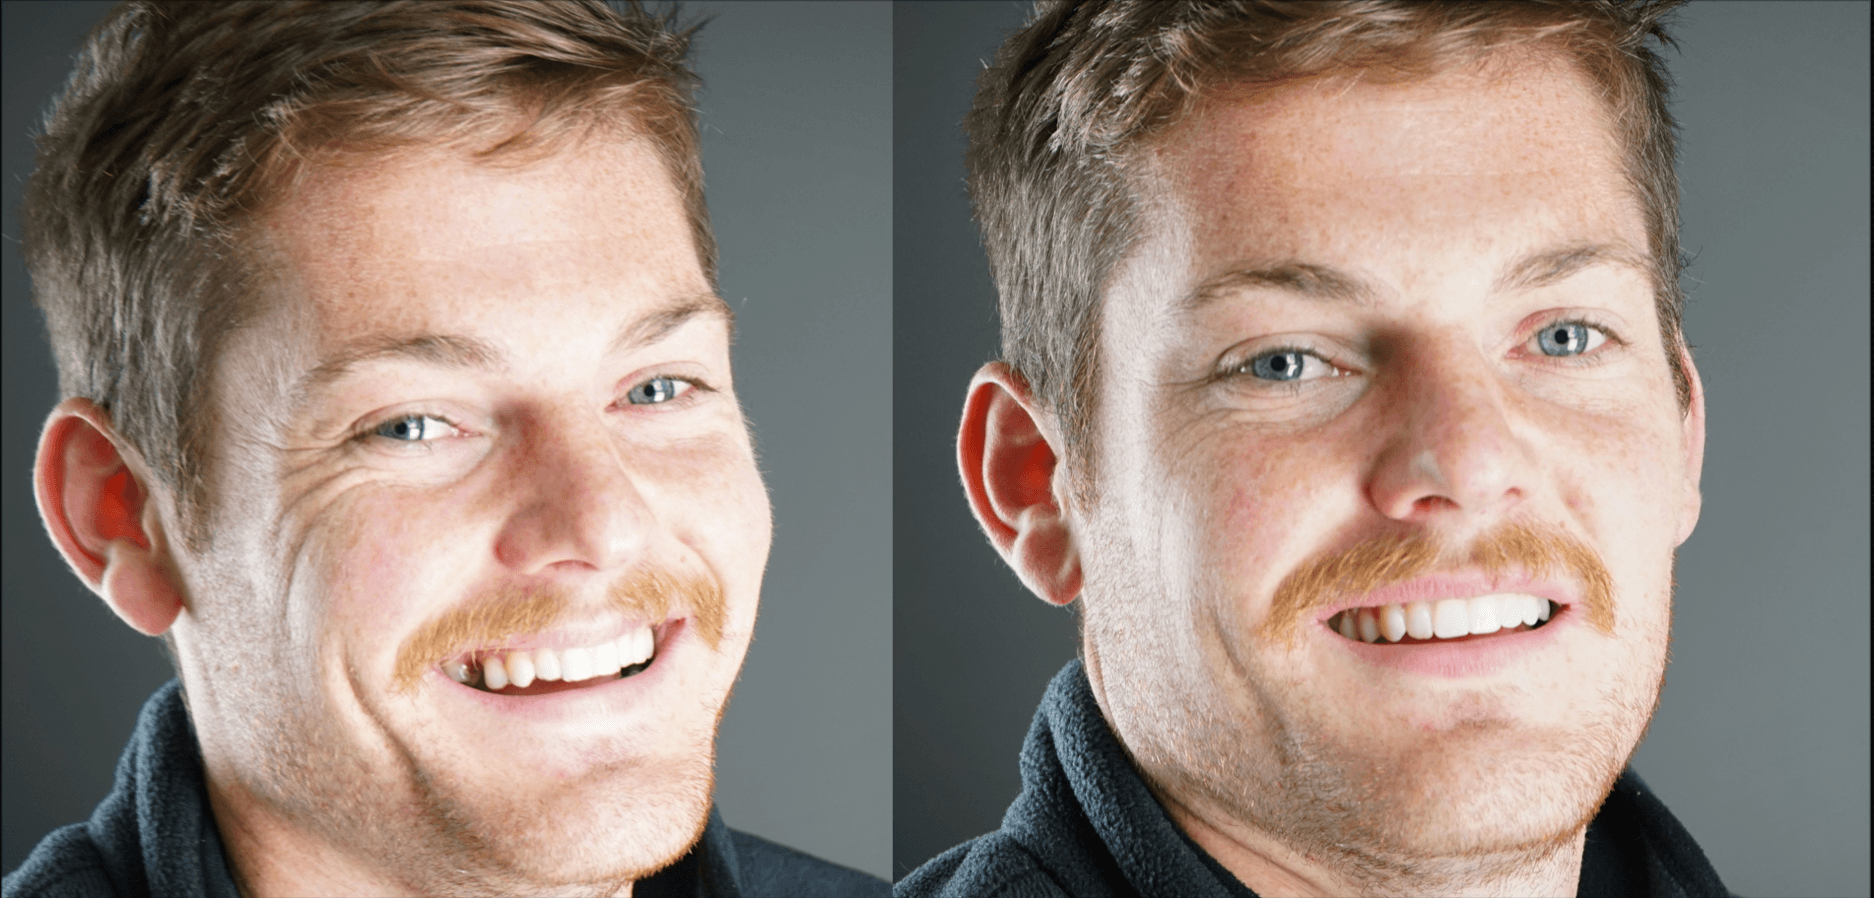
Step 7: Functional Test Drive
After a second quality-control analysis confirmed Connor's teeth were precisely positioned, we performed a "functional test drive."
This is similar to the original test drive back at Step 3, but with a key difference - unlike the original test drive that was clipped over Connor's misaligned teeth, this test drive is performed with Connor's teeth in their ideal positions.
In this way, we can simulate the final result of Connor's smile before we actually perform any restorative treatment.
This test drive serves two purposes:
1. It ensures Connor is delighted with the design before committing to treatment, and
2. It allows us to ensure his final restorations will allow Connor to speak normally without a lisp.
This gives Connor yet another opportunity to share creative input into his final smile

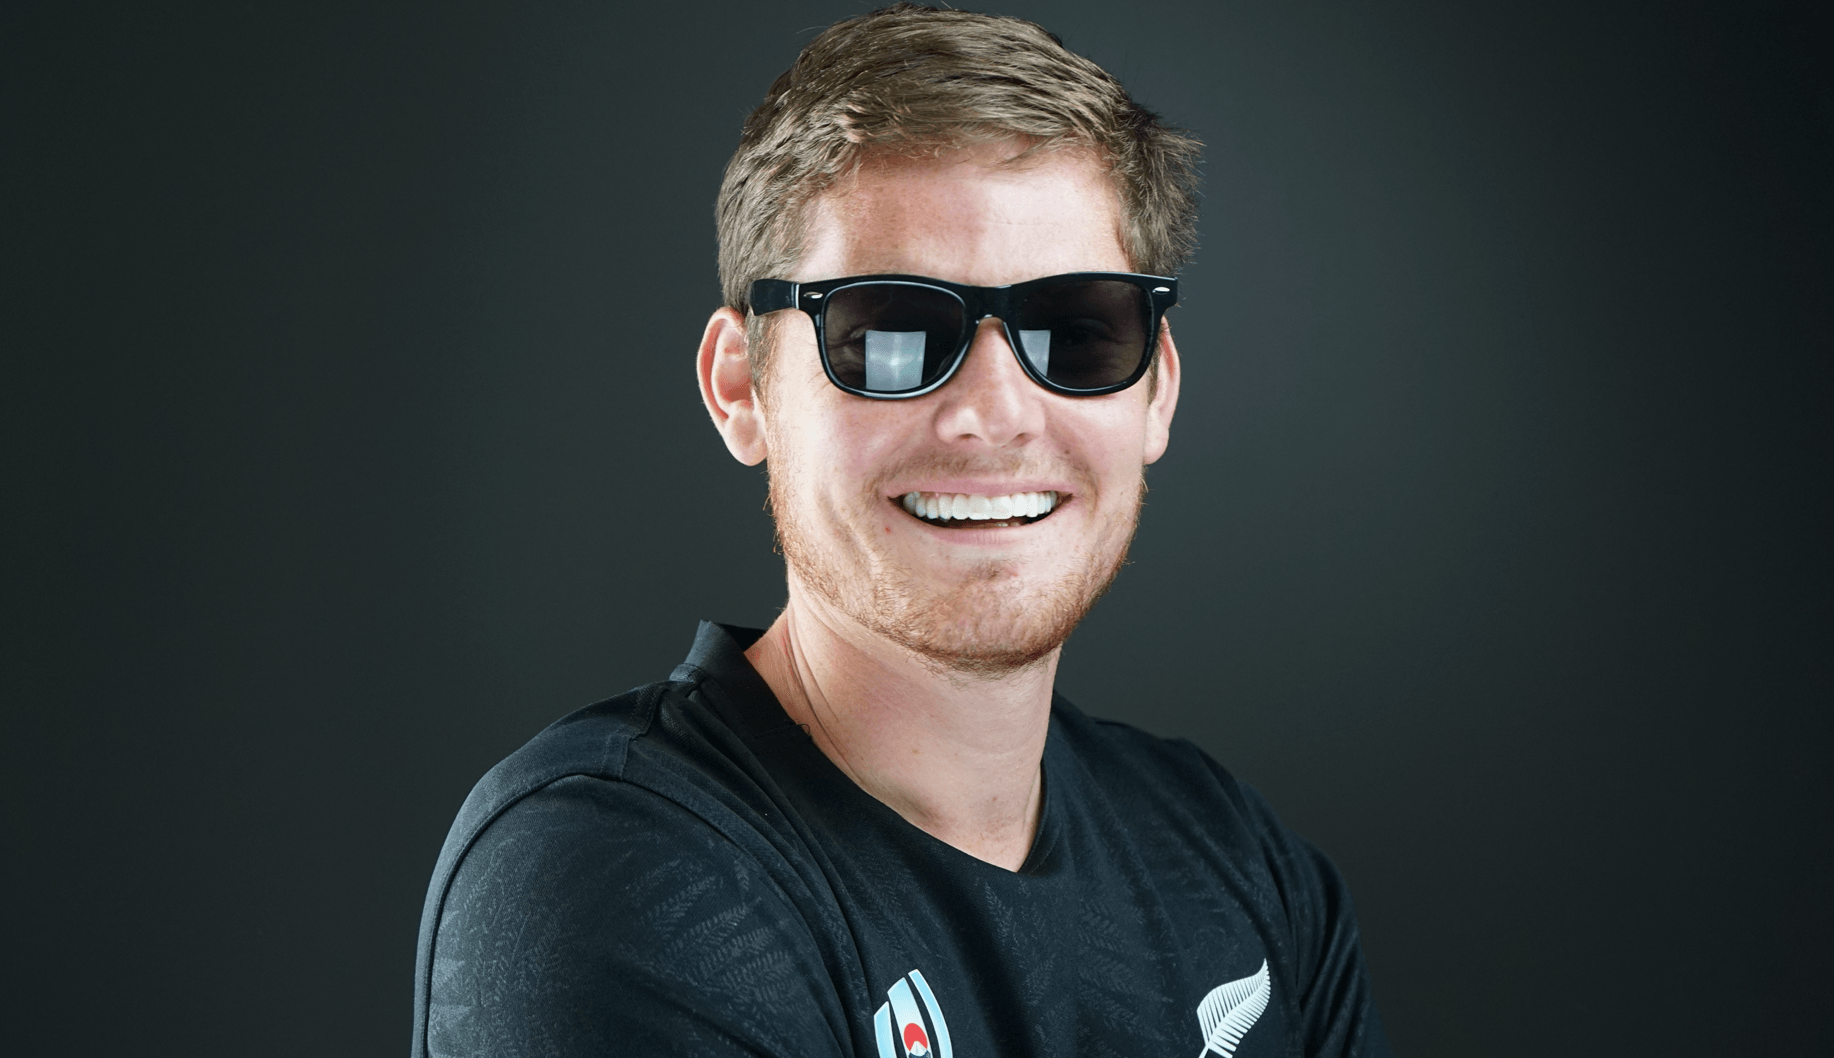
Step 8: Final Restorations
Delighted with his "functional test drive," Connor was happy to finally enjoy his new smile.
Using a completely non-invasive technique (i.e. no injection and no drilling), we built up Connor's teeth with composite resin to the precise contours of our original design.
As you can see, there is consistency in our design from start to finish.
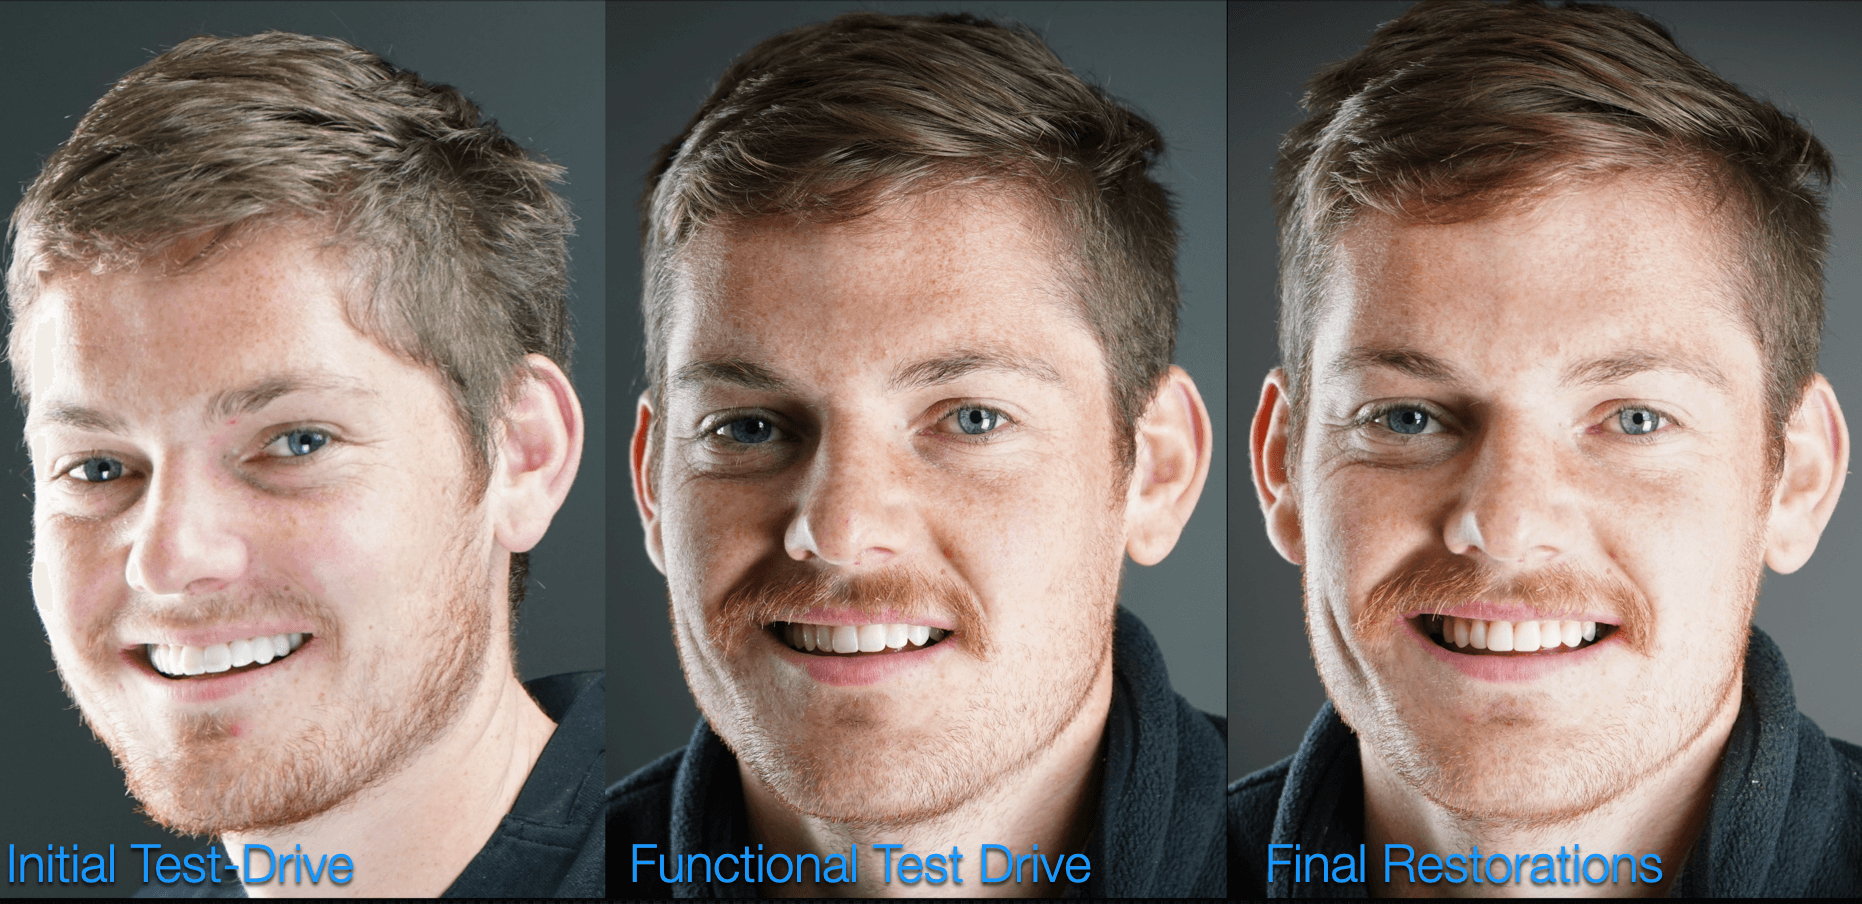
This ability to design a naturally beautiful smile that perfectly harmonises with your face ensured Connor will wear his new smile with confidence and pride.
Contact Us
Hoki Dental
18 Revell Street
Hokitika
Studio Hours
Tuesday-Thursday
9:00am - 4:30pm
Friday
9:00am - 4:00pm
Saturday-Monday
Closed
Social Media


Contact Us
Hoki Dental
18 Revell Street
Hokitika
Studio Hours
Tuesday-Friday
9:00am - 4:30pm
Social Media
© Copyright 2024